For business owners, repair technicians, and prototyping specialists, achieving clean, precise cuts on delicate materials often feels impossible with traditional blades. Standard knives crush foam, melt plastic, or leave jagged edges on circuit board components. An ultrasonic cutter accessory kit eliminates these frustrations by using high-frequency vibrations to slide through materials effortlessly. Whether you are removing flash from injection-molded parts or trimming adhesive films on displays, this step-by-step guide will help you integrate ultrasonic cutting into your professional workflow.
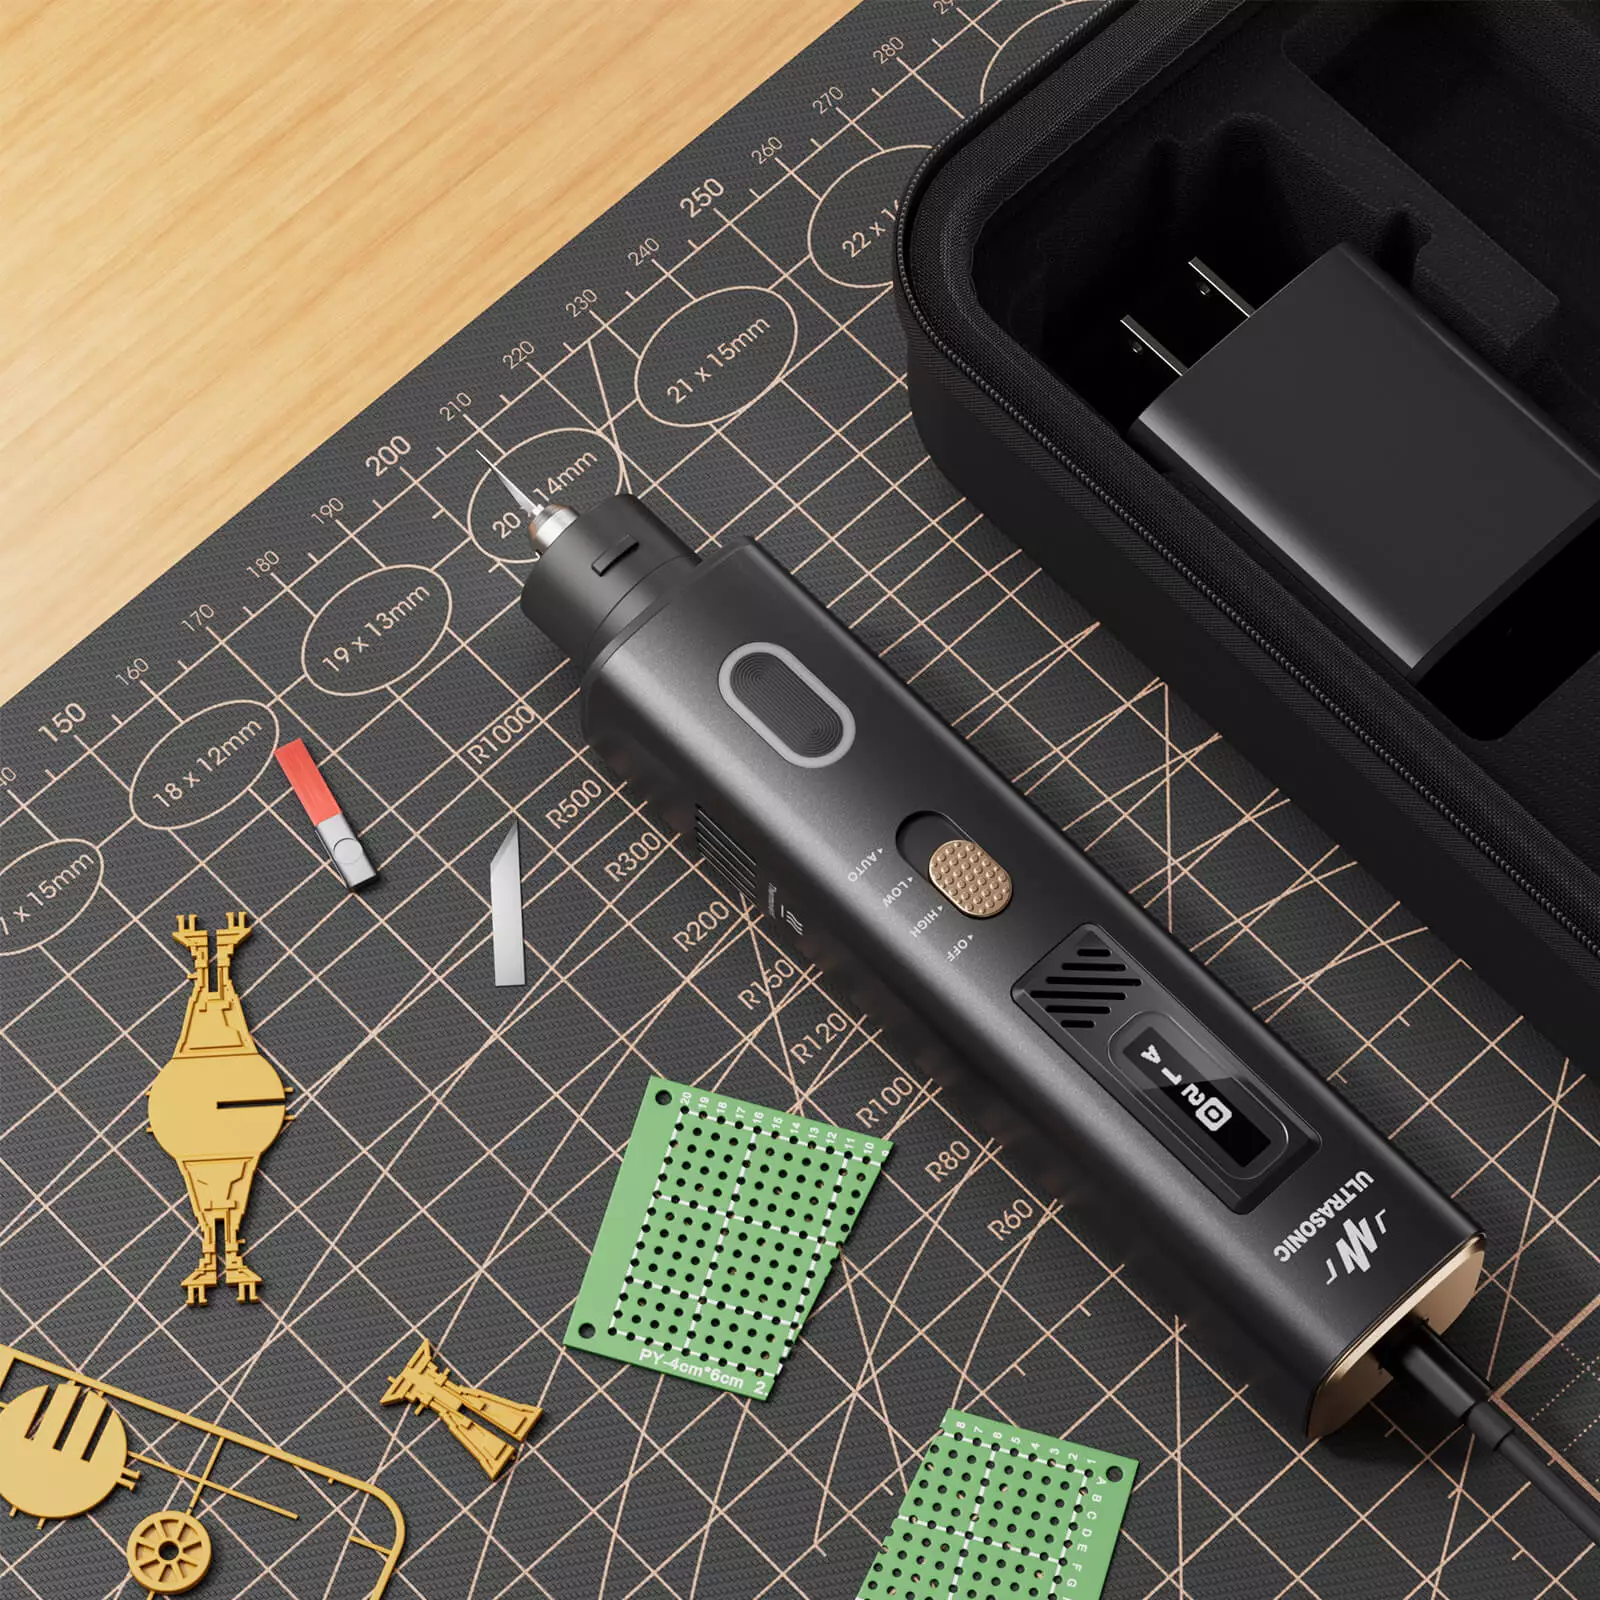
Step 1. Select the Correct Blade for Your Material
Every precision task begins with blade selection. The proprietary blade system includes a 24mm 30° flat-base single-tip blade that outperforms standard alternatives for general-purpose cutting. For tight corners and intricate details, the Pro version adds a 60° narrow blade, a chisel blade for flush cuts, and a straight blade for linear scoring. Before powering on, use the included S2 wrench to securely fasten your chosen blade. Store spare blades in the integrated blade cover storage to keep your workspace organized. Always test on scrap material first—the 40kHz frequency reduces resistance so dramatically that you may need to adjust your pressure expectations.
Step 2. Set Up Safety Features and Power On
Engage the child safety lock switch before connecting power—this prevents accidental activation during handling. Plug in via Type-C for 35W fast charging, which delivers extended runtime from a brief charge. Press the front LED lighting button to illuminate your cut line clearly. Hold the tool at a 45-degree angle and let the ultrasonic vibration do the work; do not push or force the blade. For cutting ABS plastic enclosures, guide the flat tip steadily along your marked line. For removing excess resin from PCB assemblies, switch to the narrow 60° blade if using the Pro version.
Step 3. Perform Cutting, Grinding, and Polishing
Allow the 40kHz frequency to reduce cutting resistance by up to 90%. Make multiple light passes rather than one heavy cut. For grinding or polishing, swap to the appropriate tip without changing tools—the 2-in-1 functionality handles both tasks. Use light, circular motions to smooth rough edges immediately after cutting. Avoid common mistakes such as twisting the blade mid-cut or gripping the tool too tightly. A relaxed hold allows the ultrasonic vibrations to transfer properly to the cutting edge. For thick materials up to 2mm hard plastic, use the straight chisel blade on the Pro model. After each use, detach the blade, clean residue with isopropyl alcohol, and return everything to the accessory kit.
Why Professionals Trust This Approach
After mastering these steps, you will understand why we at Jakemy have dedicated ourselves to manufacturing reliable, high-quality repair tools for professionals worldwide. The Jakemy JM-Y10 and Jakemy ultrasonic cutter series represent our commitment to precision and safety, combining a 35W 40kHz 2-in-1 handheld cutter and polisher with thoughtful features like fast charging, LED lighting, and interchangeable blades. Our wholesale screwdrivers are already trusted as essential phone and electronic repair tools in bulk quantities. Now, with the Jakemy JM-Y10, we invite you to experience the same level of engineering excellence in ultrasonic cutting—elevating every DIY project from frustrating to flawless.